Win by annihilation or by outlasting the turn limit on Battle Rating. How advantage swings, what counterattacks cost you, and front/back row rules.
Sengoku Rance Combat Guide: Battle Rating and Formations
An army battle ends one of two ways: destroy every enemy unit, or let the clock run out with the bar at the top of the screen in your half. Losing is rarely about your numbers — it is about which of the six deployment slots each unit occupies, and whether you spent the fight chipping a unit you could have finished.
Every long guide calls that bar the Battle Rating. The official English build calls it Advantage, and the damage multiplier Battlefield Adjustment; the 2009 fan patch said Battle Rating and Battle Effect. The Steam version differences page maps the rest.
The Two Ways to Win an Army Battle
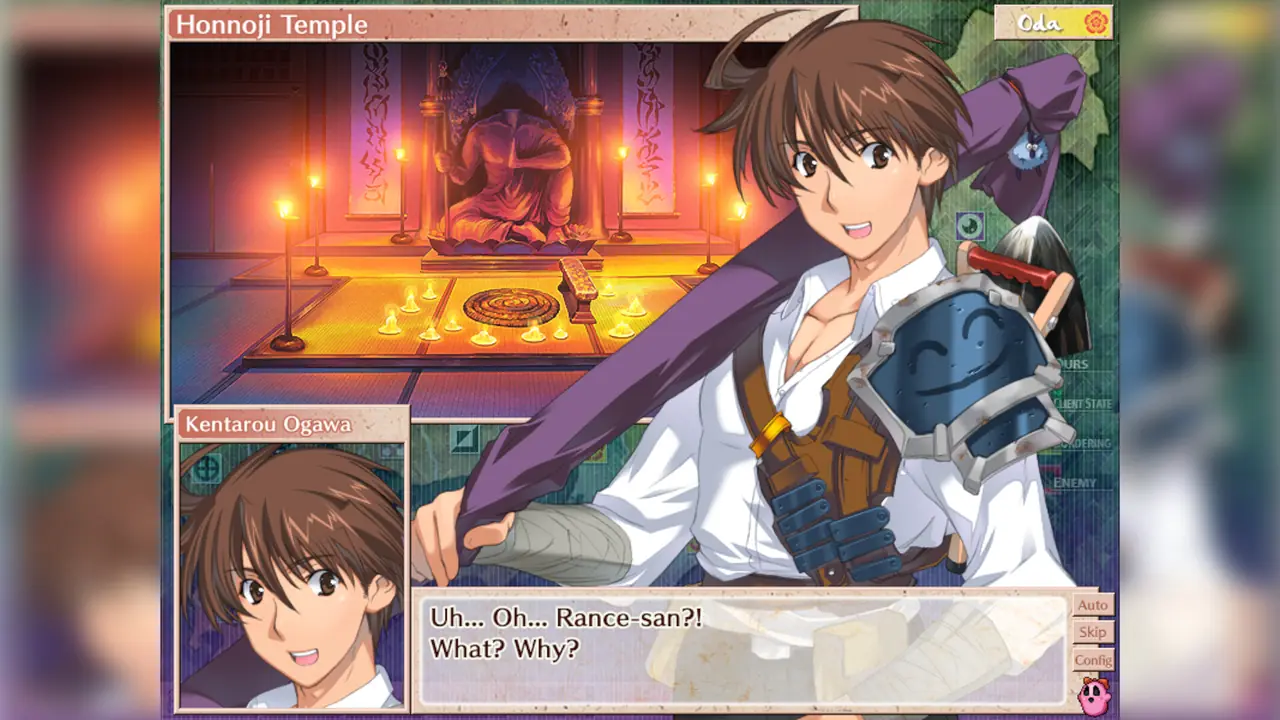
You deploy up to six commanders. Troop count is both hit points and the ceiling on what a unit can deal; at zero troops a unit is annihilated and leaves the fight. The clock down the middle of the screen is a row of bars, each going out when a unit acts, and when the last one goes the battle is decided.
A strictly positive rating means you win, a strictly negative one means they win, and an exact tie goes to the defender — which is why attacking into a castle is bad even with the bigger army.
You do not have to kill anything. Buy clock instead of trades: the Sohei skill Extended Battle adds 4 turns (6 upgraded), and the dungeon item Yomi Clock starts a battle with 5 fewer turns. Extra turns with the bar already in your favour is the strategy MoeGamer's 2024 review describes against an unwanted attack.
If Rance's unit is annihilated he always dies at the end of the battle, ending the whole run. A rating you were winning on does not save him.
What the Bar at the Top Actually Measures
Rating = [(100 x your cumulative damage) / total damage + your modifiers] - [(100 x enemy cumulative damage) / total damage]
Both counters are seeded at 10% of total troop count when the battle opens, so the rating starts at zero, and healing never feeds it. The value is recomputed whenever the cumulative totals change, which is why the bar creeps rather than jumping per hit. The visible slider is the rating divided by 400.
| Terrain | Opening rating to defender | Opening Battlefield Adjustment |
|---|---|---|
| Field | +10 | +0% |
| Town | +20 | +10% |
| Castle | +40 | +20% |
The formula page gives those rating figures; the wiki's separate tips page reads the same bonus as roughly 10% / 30% / 90% on screen. The two disagree, and both agree castles are the worst place to attack.
Why Finishing a Unit Beats Damaging It
Damage moves the ratio term gradually. Annihilating a unit does two things at once. It adds a flat +5 rating to the side that did not lose the unit, and it removes that unit's troops from the enemy's future damage pool. So deleting a small cheap unit usually beats pouring the same damage into a tank: the +5 arrives regardless of the unit's size.
- Cavalry Advantage Up 1 / 2 — +8 and +15 to your side.
- Tactician Advantage Down I / II — +5 and +10 to your side.
- Witty Turnabout (Ikkyu, preparation-gated) reverses the advantage outright.
- Witty Comeback swaps both sides' ratings and their cumulative damage totals.
The formula page lists Shouting Charge, Rance Attack, Kentarou-kun Slash and Commander Charge as adding rating, then marks them bugged: in the code, not functional. Do not plan around them.
Ninja plays the rating sideways. Encampment Construction 1 / 2 / 3 raises Battlefield Adjustment by +4% / +6% / +8%, not the rating. Assassinate is the rating play: an instant kill is an annihilation worth the same +5, and it ignores Defense Shikigami barriers.
Battlefield Adjustment: The Multiplier Nobody Reads
Damage = { [adjusted troop size x (Attack - Defense)% ] x skill modifier } x (1 + Battlefield Adjustment)
Magic uses the same shape with Magic Attack minus Magic Defense. Both differences floor at 10 and the bracketed term caps at the unit's actual troop count. Battlefield Adjustment favours one side in both directions and never exceeds 50% for either side.
| Source | Battlefield Adjustment added |
|---|---|
| Field / Town / Castle (defender) | +0% / +10% / +20% |
| Successful scouting | + the scouting difficulty, in points, to the scout |
| Ninja Art: Encampment Construction 1 / 2 / 3 | +4% / +6% / +8% per use |
| Prepare for Next Battle | whatever you have banked in that province |
The AI never scouts, so scouting is a free edge to build before any war starts. One exception: a town in Yamatai held by the Miko Union starts at +50% before other modifiers, in the official route and National Mode alike.
Prepare for Next Battle: Banking Toward the Cap
Prepare for Next Battle is a blue Construction command issued per province.
- Difficulty is min(99, 5 + floor(current prep / 2)) — cheap at first, progressively worse.
- Each use adds +7 to that province's prep, or +3 more per Battle Preparation Effectiveness to [number] Satisfaction bonus taken.
- Every turn start, every province's prep drops by 3 points, floored at zero.
- Once you actually fight a battle there, its prep resets to 0. Operation Permits do not count; neither do skipped or scripted event battles. You can bank past 50%, but the effective value is still capped there.
Because of the decay, prep is a burst tool: stack it in the turns right before you attack. Which Satisfaction bonus funds it is on the actions guide; funding the army itself is a national power question, covered on the stats guide.
Preparation-Gated Attacks and How to Cancel Them
| Class | Preparation-gated skill | Effect |
|---|---|---|
| Onmyouji | Shikigami / Shikigami 2 / Advanced Shikigami | 1.1x / 1x / 1.5x to all enemies |
| Onmyouji | Greater Thunderstrike (Omachi) | 1.5x to all; needs two cancels |
| Archer | Amateur Volley | 0.5x to all enemies |
| Miko | Miko Storm / Miko Storm 2 | 10% / 30% of enemies' max troops |
| Mage | Death by Poison | 50% of enemies' current troops; never annihilates |
| Tactician | Witty Turnabout | reverses the advantage |
| Sohei | Reaper Scythe (Seigan) | all enemies lose 25% of max troops |
One correction to a common belief: there is no preparation-gated attack on the Musketeer. Its standard Shoot is a plain 1x with no wind-up; the RPG Codex review calls Musketeers the most deadly units on the field but fragile, attacking once or twice before they are spent. Their real constraint is positional.
Cancelling a wind-up takes a specific tool: Ninja's Shuriken, Shuriken 2, Chirp Chirp Shuriken and Sonic Shuriken, with the wiki's caveat that more than one hit may be required, or Urza's Precision Shot, which cancels preparation board-wide and strips one action from every enemy unit. Greater Thunderstrike and Death by Poison need two cancels.
Counterattack Safety: What Each Attack Costs You
Counterattack damage is not a fixed percentage. It starts from what the defender's unmodified physical attack would have dealt — only their buffs, class, troop count and stats apply — then scales by what you used.
| Your move | Counterattack taken |
|---|---|
| Roundabout Charge, Commander Charge, Ally Avenger, Youkai Purge, Pursuit | none |
| Samurai Attack | about 25% |
| Full Power Samurai Attack | about 50% (listed as twice Samurai Attack) |
| Guard Break | 20% of Samurai Attack |
| Mercy Charge | 80% of Samurai Attack |
Defender passives multiply this, stacking: Counterattack 1 doubles it, only grantable to Sohei, Samurai and Ashigaru; Counterattack 2 triples it and appears on Teru Mouri and Yoshihisa Shimazu. A safeguard keeps counterattacks from landing as trivial chip. One attack also breaks a Defense Shikigami barrier for free, and Battlefield Adjustment appears irrelevant here.
It deals 0.8x damage but takes only 20% of Samurai Attack back, roughly a fifth of what the same Samurai would take from a normal attack. Against a defender with Counterattack 2, that decides the fight.
Front Row, Back Row and Ashigaru Guard
Six slots, two rows of three. Samurai, Ashigaru and Musketeer can only attack from the front column; Archers, Ninjas and other ranged classes act from both, and the back column is reachable only by magic or ranged. A Musketeer or Ashigaru in the back row is a dead slot — the most common way players lose a battle they should have won.
Ashigaru and Knight guard for their neighbours: the percentage over their head is the chance they intercept an attack on a friendly unit in the same column, or the whole group with All Guard. While guarding they take half of all non-magic damage. Guard chance is built from INT — Ally Guard adds INT x 20% per use, Neo Ally Guard INT x 30%, All Guard converts it to a group chance at INT x 10% — and drops 40% every time an Ashigaru is actually hit, unless a Defense Shikigami covers it.
The only documented ways through a 100% guard are a multi-target attack such as Volley, or a single-target attack aimed at a different unit another Ashigaru is covering. Ashigaru guard each other but never themselves. The tips page adds the reverse: you do not always want ranged units in the back, since front placement gets them Ashigaru protection without spending an action on All Guard.
Your Tactician is not a random buff dispenser either — priority is fixed, giving Ashigaru DEF first, Onmyouji INT, and Samurai, Musketeer and Archers ATK. Level does nothing in army battles; what each type is good at is on the unit types guide, dungeon levelling is a separate investment on the dungeons guide, and annihilating units is how capture odds get locked in — see the capture guide.
FAQ
Can I win without killing anything? Yes — survive until the clock empties with the bar in your half. Extended Battle and the Yomi Clock item buy turns without trading troops.
Why does my Musketeer deal no damage? It is almost certainly in the back row. Musketeers only attack from the front column, and their class Defence is zero.
Official source: Sengoku Rance on Steam — release date, platform and supported languages were read from the live store page and the appdetails API on 2026-10-03. Every system value here comes from the community-maintained AliceSoft Wiki pages for Parameters and Formulae, Skills, Game mechanics, Satisfaction and Tips, which document the 2006 Japanese original (v1.04) and the MangaGamer 2019 English release rather than the 2026 Steam build, and state that their formula data came from a quick look at decompiled code and may be wrong.
More Sengoku Rance Guides
Higher stars raise difficulty and starting score. What each star changes, the starting point values, and which to pick on a first run.
Dungeons are your main level-up source. 19 of them, each gated behind a specific commander or story beat, worth up to 18 party levels.
The first playthrough forces the canon ending. Here is what unlocks after it, how ending points work, and what still takes several runs.
Rough hours for the mandatory first route, what forces a second playthrough, and why 100% takes far longer than the first clear. Numbers, not vibes.
Capture odds are a 1-in-n roll, and n is 1, 2 or 5. The two skills that set it, the prison cap that blocks it, and how to raise the odds.
Action fans cap your whole turn. The thresholds are 50, 160 and 260 - here is how to reach each one and what to pick on the way.
Five item colours, five different rules. Learn the coding once and you can read every drop, shop entry and transfer item at a glance.
There is no Steam Workshop for this game. What the well-known external total conversion adds, and what to check before you install anything.